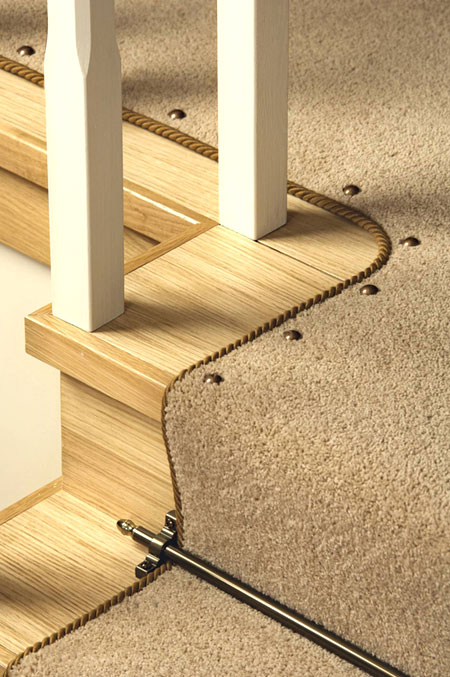
How to Fit Carpet Studs for the Perfect Stair Finish
Carpet studs, which you might also know as carpet press studs or carpet fixing studs, are more than just functional tools. They play a dual role in securing stair runners in place and adding a touch of elegance to your staircase. Available in a variety of finishes, these small but impactful accessories can transform your stairs into a feature that’s both safe and stylish.
In this guide, we’ll walk you through the process of fitting carpet press studs step by step. Whether you’re a DIY enthusiast or a first-time renovator, we’ll help you achieve a polished, professional look for your staircase.

The Tools and Materials You Need
Before you begin fitting your carpet studs, it’s important to gather everything you’ll need for a smooth and efficient process. Here’s a checklist to ensure you’re fully prepared:
- Carpet Studs: Choose high-quality studs in your preferred style and finish to complement your staircase and decor.
- Measuring Tape: Use a measuring tape to ensure even spacing between the studs, giving your staircase a professional appearance.
- A Pencil or Marker: Marking your measurements is essential to achieve accurate placement. A pencil or marker like chalk can help you create guidelines next to where the studs will go without damaging the floor, and that can be cleaned off later. Draw them lightly for the cleanest end results.
- Optional – Rubber Mallet: A rubber mallet can be useful for gently securing press studs into place without scratching or damaging the finish.
How to Fit Carpet Studs Step by Step
1. Plan Your Layout
Before you begin, take the time to plan where each carpet stud will be placed:
- Use a measuring tape to determine equal spacing between studs along the staircase. Typically this is about six inches apart, but can vary depending on your design preferences.
- Mark the spots lightly with a pencil or marker on the uncovered area, next to where the carpet will go, to guide your placement. Ensure the marks are aligned and centred for a neat appearance.
- Double-check your measurements to avoid uneven gaps, which can disrupt the polished look of your staircase.
2. Prepare the Surface
A clean surface is crucial for proper installation:
- Vacuum or wipe down the staircase to remove dust and debris. This ensures the studs will adhere or screw in securely.
- If your staircase has a glossy or waxed finish, consider lightly sanding the areas where the studs will be placed for better grip.
3. Position the Carpet
Before fitting the studs, align and secure your carpet runner:
- Lay the runner in place, ensuring it is straight and even across the entire staircase.
- Use double-sided carpet tape or temporary tacks to hold the runner in position. This will prevent movement during the fitting process.
4. Install the Studs
Gently press the studs into the carpet using your hands or a rubber mallet. Apply even pressure to avoid damage to the stud’s finish.
Practical Tip: Begin at the top of the staircase and work your way down. This allows you to maintain alignment and avoid stepping on areas you’ve already completed.
5. Check and Adjust
Once all studs are installed, take a moment to inspect your work:
- Test the stability of the carpet runner by gently tugging on it. Ensure it is firmly secured by the studs.
- Adjust any studs that appear uneven or loose, tightening screws or repositioning press-fit studs as needed.
Common Mistakes to Avoid
Uneven Placement of Studs
One of the most noticeable mistakes is uneven spacing between the studs. Failing to measure or mark placement accurately can result in a messy, unprofessional finish.
To avoid this, always use a measuring tape and pencil to plan your layout before installing the studs. Double-check your measurements to ensure symmetry and consistency across the entire staircase.
Using Incorrect Tools or Excessive Force
The wrong tools or heavy-handedness can cause unnecessary damage. Using a hammer, for instance, can scratch, dent, or even break the studs. If you don’t think you’ll apply enough pressure by hand, opt for a rubber mallet for press-fit varieties. Take your time, too. Gentle and controlled movements will ensure secure, damage-free installation.
Neglecting to Clean the Surface
Skipping surface preparation is a surefire way to compromise the longevity of your installation. Dust, dirt, and debris can prevent studs from adhering or screwing in properly.
Before starting, vacuum or wipe down the staircase and runner thoroughly. For glossy or waxed surfaces, lightly sand the area where the studs will be placed to enhance grip.
Why Choose Carpet Press Studs from Stair Rods Direct?
We’ll gladly offer a fine selection of carpet studs in a variety of stunning finishes and designs to suit any interior style. Whether you prefer classic brass, sleek chrome, or a contemporary black finish, there’s something to elevate every staircase.
With years of expertise, we ensure every product meets the highest standards, for both durability and aesthetic appeal.
Find and Order Your Ideal Finishing Touches
Shopping with us is also convenient and hassle-free, with a great range of products and free UK delivery on orders over £75.
Don’t wait – order the carpet studs you need today and take the first step toward transforming your staircase into a safer, more stylish feature.


